In the search for a high quality wide angle lens for my Sony A7 system, a friend of mine recommended that I look at the Nikon AFS 20 f1.8 G lens. It is well known that so far, there are no options below 25mm (Zeiss Batis) for the system. The Sony 28 f2 lens accepts a converter that gives 21mm, and of course there is the Sony Zeiss 16-35 f4 zoom. None of these fit my requirements of a high quality, fast wide angle lens below 24mm, to shoot landscapes and night skies. So far, as illustrated in my previous post, I have been using a Nikkor AIS 24 f2.8 lens, which is a very good option. But I need something a bit wider and faster for some of my photography.
Thus, I started to investigate about the above mentioned Nikon lens, which is a recent introduction into the f1.8 Nikon lens line for FX (Nikon’s name for full frame 35mm format). Reading some reviews, it quickly became apparent that the lens is arguably Nikon’s best 20mm so far, which is saying a lot. Then the chance presented itself to use the lens for testing in one of my preferred areas, southwest Portugal coast; and with a new moon night sky, some star trail and Milky Way photography would provide a good testing ground.
Now, it needs to be said that using a Nikon G lens (no aperture ring) on a Sony A7 means that setting the aperture is done via a ring on the adapter (I have a Novoflex). At first, this a bit awkward, but after a while, there is no problem, as one can count stops easily by noting the changes in shutter speed, while using said ring. Another thing is, the manual focus ring is not as smooth as a true manual focus ring (no surprise there), the focus throw is not large (short turn of the ring between close focus and infinity), and the depth-of-field scale is, shall we say, not very useful (f16 marks only). Oh yes, and there are no hard stops at close focus and infinity.
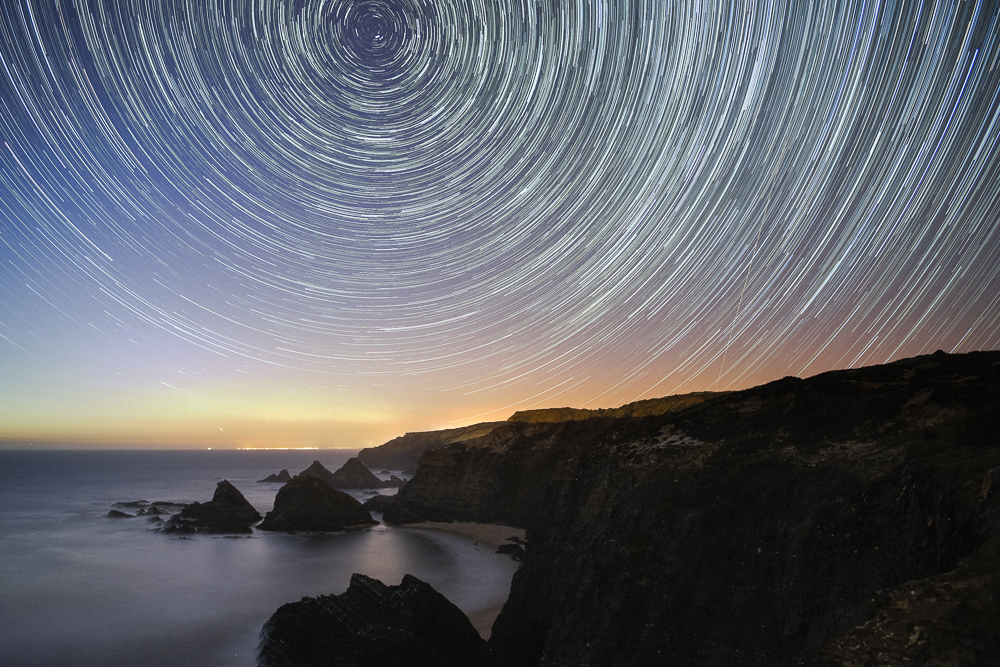
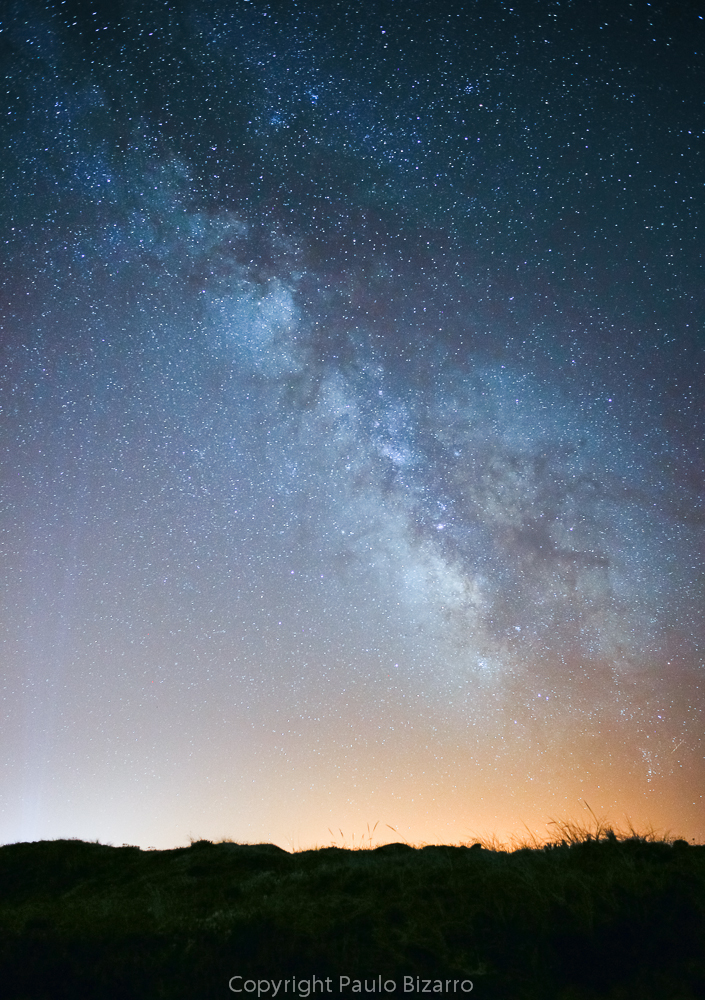
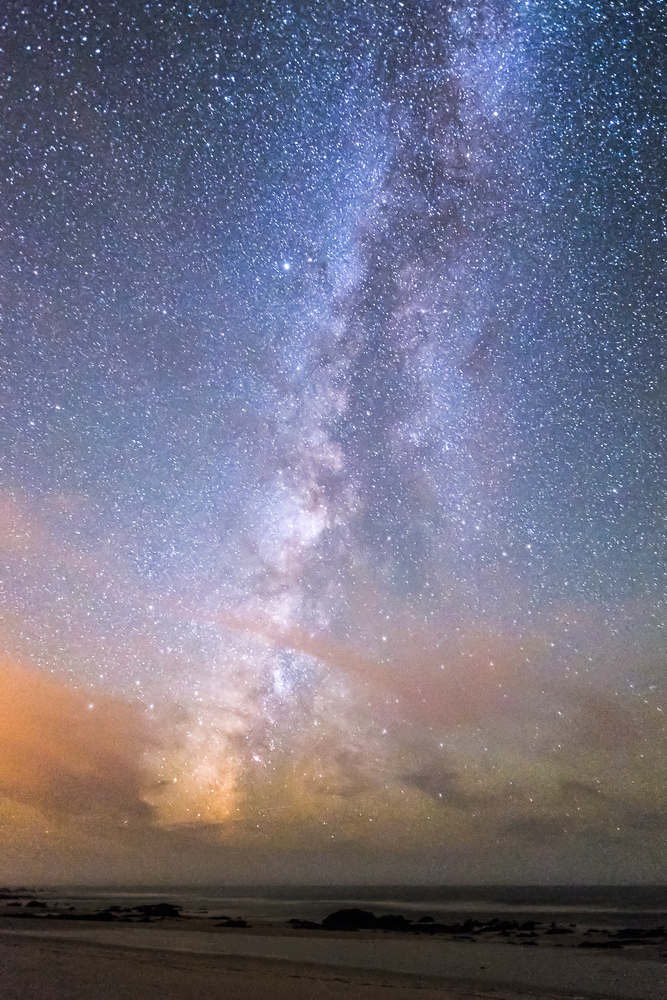
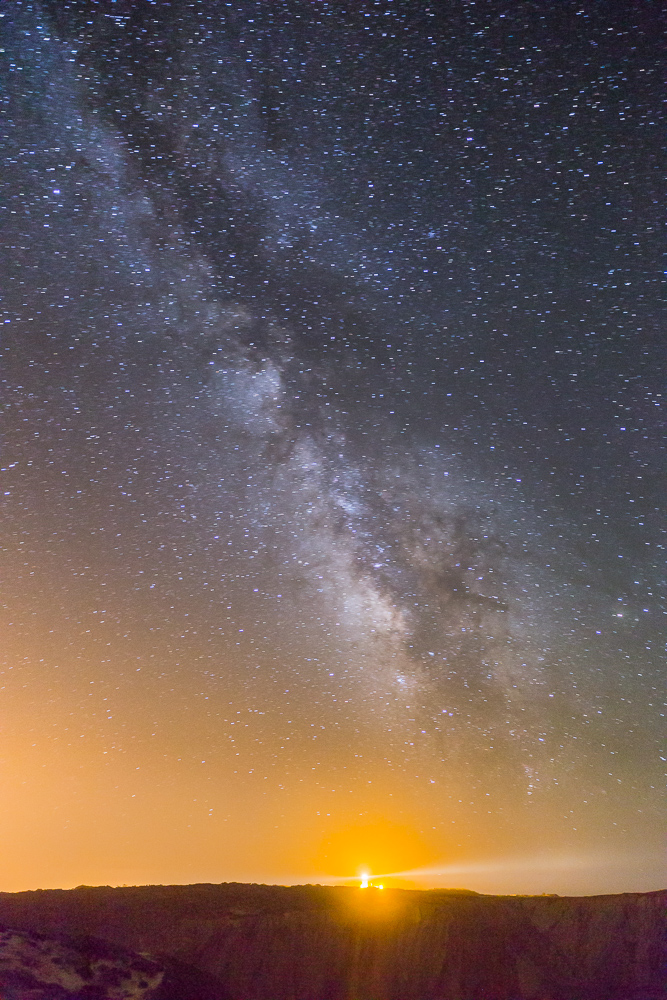
Regardless of the above (normal) limitations, the lens delivers very good results. Below are some initial test shots: a general photo to illustrate the location where I set up the night sky shots (taken at about 9.30 pm), plus a star trail and Milky Way panorama. I had a bit of concern about being able to achieve precise infinity focus, but using magnification in the LCD, I was able to quickly and easily focus on a bright star.
I will keep testing the lens in similar situations, but so far, it is looking like a winner. In terms of handling and ergonomics, the lens is not heavy, it has the common 77mm filter diameter, and comes with a lens hood. If Zeiss ever comes out with a wide angle Loxia (say 21mm or there about), it needs to be pretty good optically to outperform this Nikon.